Bird's Tutorials
Bridal Showers and Wedding Inspiration
DIY & Crafts
DIY Wedding and Bridal Shower Crafts
Party Crafts
DIY Geometric Himmeli Party Decor
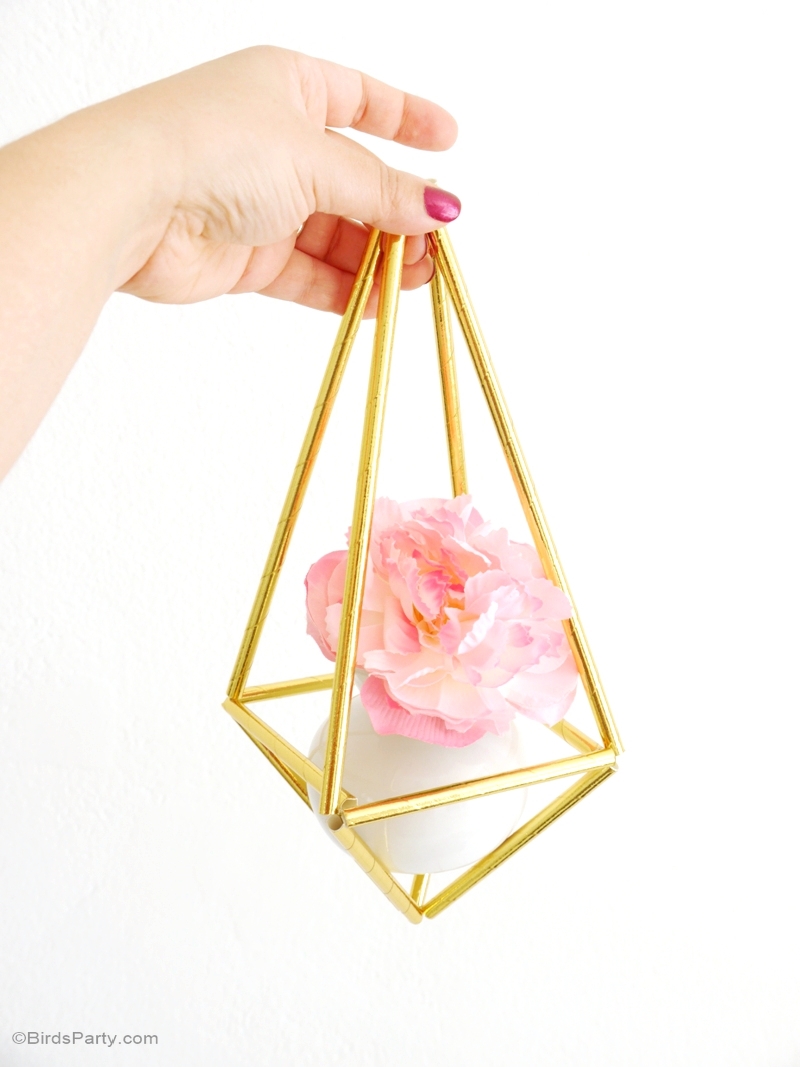
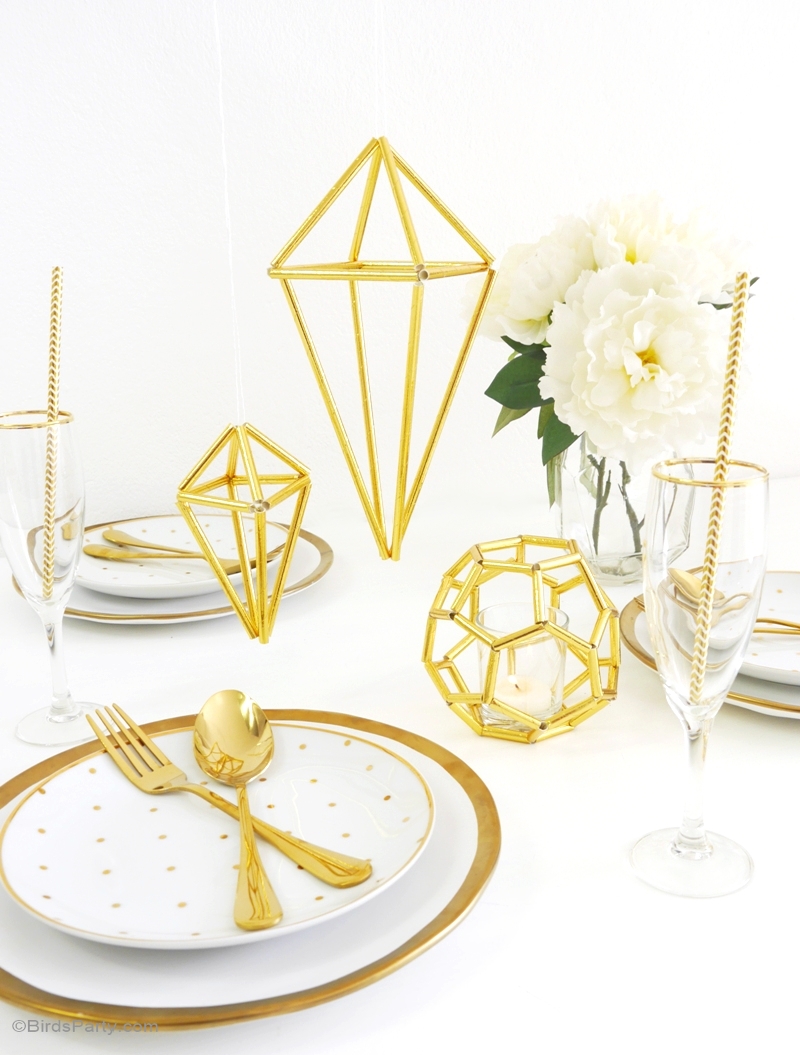
We're now stocking oh-so-pretty gold foil party straws in the shop, and apart from their obvious function as drink straws, they also make oh-so-pretty geometric decorations for our party tables, party backdrops or as hanging decor to embellish any party or home space.
And since wedding season is here, I decided to craft a few simple decor pieces to show you how versatile they are as a party prop! ;)
Let's also take a moment to appreciate how inexpensive and above all, how much FUN this type of DIY decor is!! :)
I used one one pack of 25 gold paper straws to create all three of these Himmeli geometric shapes for my table decor, AND I still had a few straws left over at the end of the project!
I love how shiny they are and can't wait to make some more of these Himmeli geometric with other colored straws, like our gold foil polka dots straws!
DIY Geometric Himmeli Party Decor with Gold Foil Straws
Materials:
* thin gold craft wire (I used 0.4 mm thick)
* wire cutters
* scissors
* string or twine for hanging (optional)
Instruction:
DIY Diamond Himmeli Hanging Decor
1) For the diamond shaped Himmeli hanging decor you'll need 4 full sized straws (4 long straws) + 4 straws cut in half lengthwise (so you get 8 short straws).
Thread the wire through 4 pieces of shorter straws, then bend the wire to form a square base. Tie the ends together to close the square.
2) Insert two more short straws into the long wire (leave the short wire loose until the end).
CRAFTY TIP: If needed, tie extra wire to the end of the long wire to increase its length as shown in above, making sure to twist the two wires really well together. And don't worry, the wires will be hidden.
3) Bend the wire over the square to form a triangle shape, and loop a couple of times in one of the corners of the square base to secure it.
4) Now pass the long wire inside one of the straws to the opposite corner, and insert two more short straws. Bend the wire over the first triangle and loop the wire a couple of times again in the middle and on the opposite corner of the square base.
5) Insert a long straw into the long wire.
6) Bend the wire over as shown and insert a second long straw. Loop in one of the square base corners to secure in place.
7) Pass the wire through the top short straw, then insert a third long straw.
8) Insert another long straw and bend over to the last corner of the square base. Loop the wire twice again to secure.
Pass the remaining wire through the opposite straw to meet the short wire from step 1. Twist the wires together to close your geometric diamond shape. Cut the wires shorter and hide the ends back into one of the straws.
You can now use your shapes as decorative hanging decor, mobiles, plant holders etc.
CRAFTY TIP: You can make this diamond shape any size by varying the lengths of your straws. So for a smaller version, you'll need 2 straws cut in half (so you get 4 long straws) + 2 straws cut into two inch pieces (so you get 8 short straws). Then just repeat steps above to make your smaller Himmeli shape.
Once you've made a diamond shape, then you'll feel more familiar with the process and may want to try creating more elaborate shapes like the hexagon Himmeli candles holders below.
DIY Hexagon Himmeli Candle Holder
1) The goal here is to make a row of pentagons all around a hexagonal base, followed by a row of hexagons, then another row of pentagons with a last hexagon as the opening
You'll then need straws of the same length. It's up to you what length you choose, but for a small candle holder, I used 3 cm (1 inch) pieces and started with a hexagonal base.
2) Proceed as above to create your shapes - insert wire through straws, bend, loop to secure in place, repeat... For the pentagon, use 4 wires and secure above the hexagonal base.
3) Close the wires by looping as before.
4) Continue to form a row of pentagons all around the side of hexagonal base.
5) Now proceed to make a row of hexagons above the first row of pentagons.
6) Continue to form a row of hexagons all around.
7) Now finish with a row of pentagons above the hexagon row. You'll need only 3 straw pieces for each.
8) Finish with a hexagon as the opening of the candle holder.
PS - Since we're using paper straws (which can be flammable) I suggest you use this piece with an LED candle or flameless candles only. It would also be super cute as decorative object around the home or as a small bud vase for table flowers!
Hope you like the ideas!
For more wedding and party decor, check out our party DIYs here.
DIY Geometric Himmeli Party Decor - Party Credits
* party styling and photos: Bird


Very cool! I love this!
ReplyDeletelove it!!! Thanks for sharing. Why didnt think of that?! lol
ReplyDeletelol I know the feeling! ;)
DeleteThese are gorgeous, so many different uses. Thanks for the fab inspiration
ReplyDeleteWhat a gorgeous and unique idea you have come up with!
ReplyDeleteThank you for sharing this post with my No Rules Weekend Blog Party. I wanted to let you know that I have chosen this post as one of my Monday Special Features! If you’d like to take a look look here’s the link: http://lifeasweknowitbypaula.blogspot.com/2016/05/monday-special-features-11.html
Have a great week!!
Paula
Reply
Wow they look soo fancy for so cheap!
ReplyDeleteThanks for linking up with Welcome Home Wednesdays!
liz @ j for joiner
These are so awesome! I absolutely love them! Thanks so much for sharing at Merry Monday this week. :)
ReplyDeleteThese are so pretty! Thank you for sharing. You are one of the fan favorites at the Sunday Showcase from the Make it Pretty Monday party at The Dedicated House. Here is the link to check out your feature. http://www.thededicatedhouse.com/2016/05/sunday-showcase-make-pretty-monday-6-5.html Hope to see you tomorrow night at Make it Pretty. Have a lovely week ahead. Toodles, Kathryn @TheDedicatedHouse
ReplyDeleteWow! Such a creative idea, thanks so much for the share!
ReplyDelete