diy
DIY & Crafts
DIY Home and Decor Crafts
DIY Thanksgiving and Fall Crafts
5 Neutral DIY Pumpkin Decorations for Fall
Fall season is officially here, so we're kicking things off with pumpkins, what else?!
I've never been one for carving pumpkins, so when it comes to Fall décor, I reach for my glue gun instead! 😉
So today, I am sharing 5 different ways you can craft with pumpkins and help transform inexpensive pumpkins into pretty decorations to use in your home this Fall!
5 Neutral DIY Pumpkin Decorations for Fall
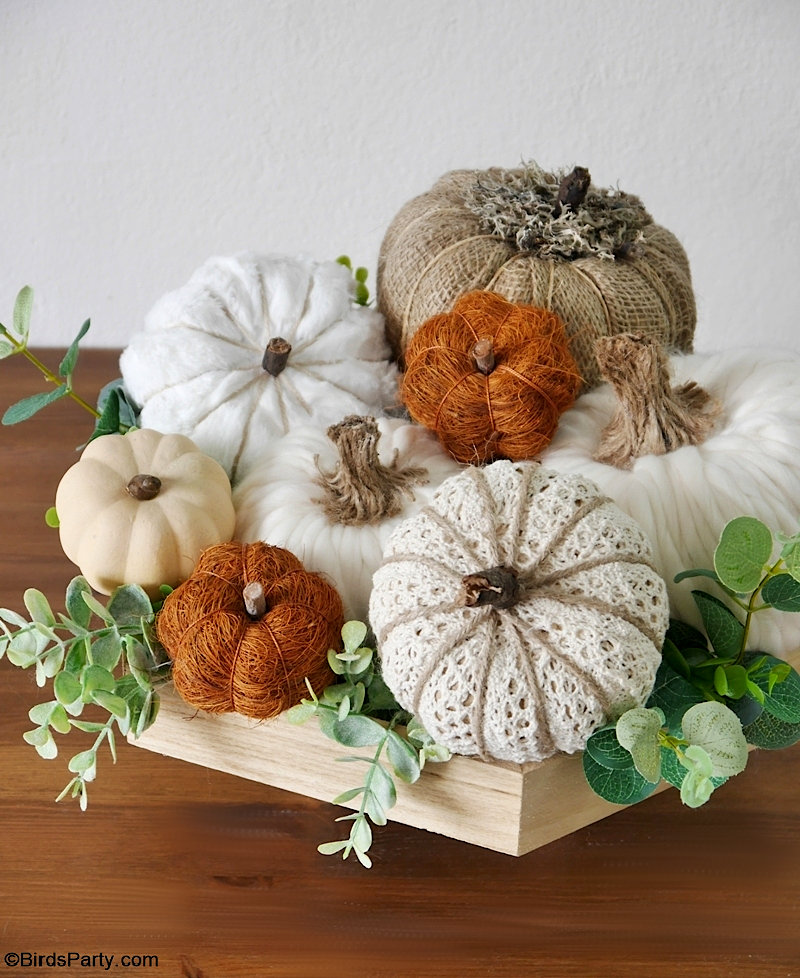
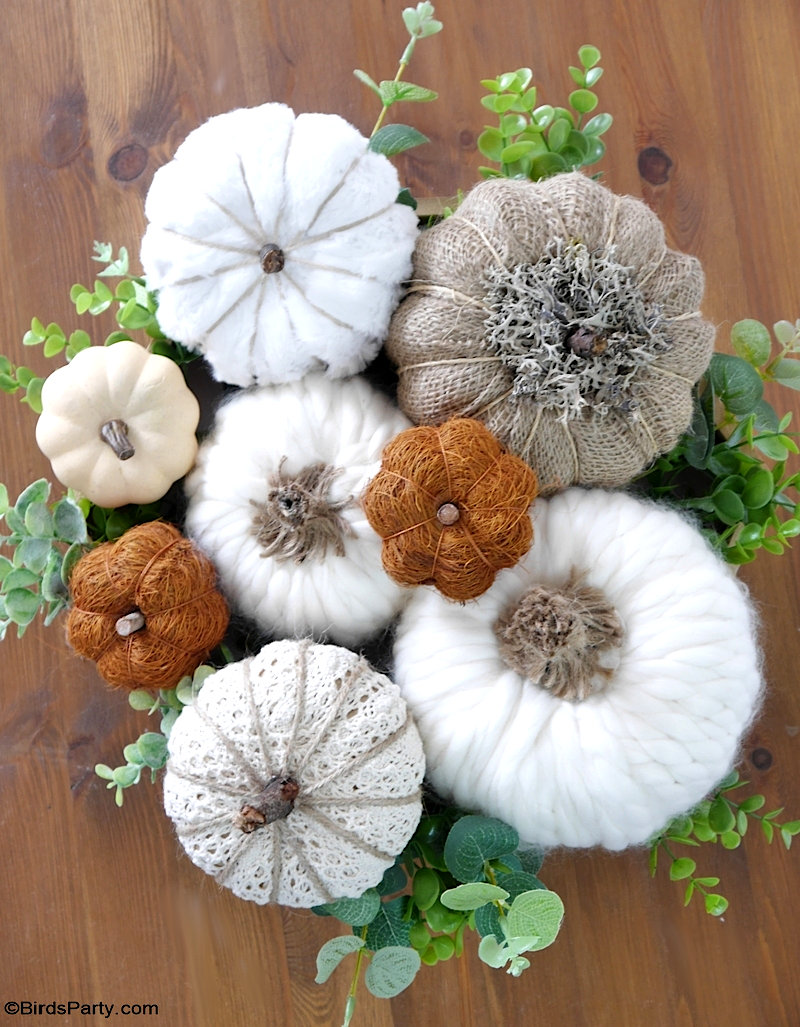
This year I'm loving the neutral color palette and cozy vibe for my Fall décor. So I turned to materials like burlap, yarn, lace and faux fur to craft with.
These DIY neutral pumpkins were SO easy to make, and the projects used mainly materials that I already had at home, like fabric scraps, ribbon, pumpkin shapes from last year, and twigs from my garden.
But if you don't have the exact same materials I used, you can totally use the same techniques and switch up the fabric types, colors and size of pumpkins.
I also had fun styling a couple of different looks using these neutral pumpkins to show you how you can use them in your home décor this Fall!
I loved grouping all the pumpkins into a wooden tray, and added foliage to create a pretty centerpiece!
Or you can also display them separately around the home, like I did for my tiered tray and on a mantel or shelf for example.
For these projects I re-purposed some paper maché pumpkins that I already had at home. These pumpkins had a massive hole on top (see what I made with them last year in this post). But you can also use polystyrene pumpkins for example, or even inexpensive plastic pumpkins too.
The materials I used to cover the pumpkins with were ribbon and fabric I had at home, but you could also use a pretty tea towel for example, or thrift store fabric to keep costs low.
Like I said, you can totally vary the fabric choice and colors too. In fact, I'm planning on using a buffalo check print tea towel to create one more fabric covered pumpkin to add to my collection! 😉
All of these DIY projects were also super easy and very quick to make, which is a huge bonus in my books! And apart from the fabric and pumpkins, you'll also need hot glue, twine or string, and paint.
DIY Yarn Pumpkins
These yarn pumpkins are super trendy on Pinterest, and I was itching to try them out for myself!
For this DIY project, I used chunky ivory colored yarn, but you can use any yarn you like. But the thicker the year, the quicker this project will go.
Now, you may think that yarn pumpkins consist of just wrapping yarn around a pumpkin shape. But let me tell you, it does not!
I first tried wrapping yarn around a polystyrene pumpkin, but you end up losing the pumpkin shape altogether and get a ball of yarn with a bunch of lumpy yarn on top and bottom of the pumpkin, which is not the most attractive of things.
I also tried hot gluing strands of yarn side by side to try and neaten things up a bit. But once again, I ended up losing the shape of the pumpkin, and ended up having "clumpy" yarn on the center at the top and bottom of the pumpkin.
So it was third time lucky for me, when I switched to paper maché pumpkins! Check out the video below to see this technique in action!
DIY Burlap Pumpkins
Once again I used paper maché pumpkins for this project, and burlap fabric I already had at home.
Because the pumpkins I used were already brown, I could simply wrap it with the burlap. But if you use polystyrene pumpkins or plastic pumpkins, you may need or want to paint them beforehand to avoid the colors being seen through the burlap.
When this pumpkins was wrapped, I then used a contrasting color string to highlight the pumpkin segments.
To finish it off, I added some Spanish moss to the center and finished it off with a little twig as a stem. So cute, right? 😍
DIY Lace Pumpkins
For this DIY pumpkin craft project, I used lace ribbon. The ribbon I used was about 1 inch wide, which made the process a lot easier. If you use thinner ribbon it will off course take longer and use up more material to cover the same surface area.
A wider ribbon may make it more difficult to retain the pumpkin shape, if you're using smaller pumpkins.
The technique of wrapping worked well here, because the lace was not too wide nor too thin.
I also suggest painting the pumpkins beforehand if you like, to avoid any unwanted color being seen through the lace.
DIY Faux Fur Pumpkins
To make these pumpkins, I used faux fur ribbon. This ribbon was wider than the lace, at about 2 and half inch in width. So I used a slightly different technique to applying it to the pumpkin to ensure I retained its shape.
You could also use faux fur fabric here, and either cut it into strips and use this technique, or follow the tutorial for the burlap covered pumpkin above 😉
I also decided to highlight the pumpkin shape by wrapping it in a contrasting color string.
You can see the details in the video below!
DIY Pastel Painted Pumpkins
This one is the easiest DIY of all these pumpkin projects! All you need is a plastic or ceramic pumpkin, a little acrylic paint and you're done! 😍
I love re-using craft supplies I have at home, so this is the perfect budget-friendly project to update my décor year after year without breaking the bank!
I used pastel colored paint, but you can use any color you like to suit your taste and home décor.
Hope you like the ideas and feel inspired to have a go! If you do, tag me on social media @BirdsParty so I can see and share your creativity! 😍
🎈 SHOP this post | This 5 Neutral DIY Pumpkin Decorations for Fall post appeared first on Bird's Party Blog


So many great displays. I love them all. Great job!
ReplyDelete