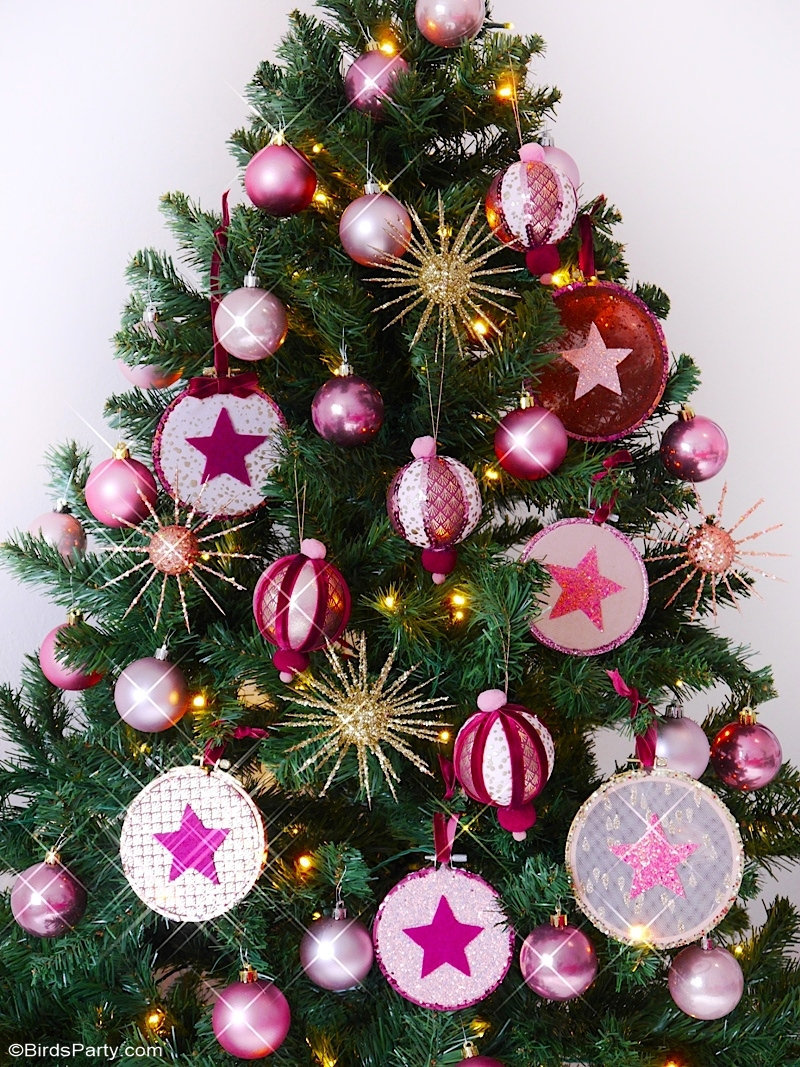
This year, I teamed up with a French craft brand to create some easy but super chic and glam Christmas tree ornaments using their latest "So Chic" collection of craft supplies in pinks, golds, rose golds and burgundy. Talk about a dreamy color palette, right?! 😍
So I came up with three easy but super gorgeous, DIY Christmas tree ornaments that anyone can make. Whether you live in France and have access to these specific craft supplies...or not!
Three Easy DIY Christmas Tree Ornaments
Obviously, you can switch up the colors in the materials used in each of these projects to suit your own taste or Christmas decor colors!
DIY Plush Christmas Baubles
First, I made these plush Christmas tree baubles covered in fabric and adorned with ribbons and pompoms.
This craft project although simple and easy to follow, is the most time-consuming of the three. So I suggest that you either solicit the help of some Christmas elves, or that you sit in front of the fire or a good Netflix series while making them! 😉
I used the gorgeous shiny, glitter and patterned fabrics from Cultura.fr, but feel free to use whatever fabric you have to hand! In fact, this project is great for using up left-over fabric scraps you may already have at home!
I love how high-end these ornaments look without much cost or effort at all!
DIY Embroidery Hoop Ornaments
Next up, I made super glitz and glam mini embroidery hoop ornaments.
I LOVE using embroidery hoops in craft projects, and they lend themselves pretty nicely to this particular DIY project!
Once again, I used tulle, felt and glitter felt (so dreamy!) from the French brand's new collection, but feel free to use any color, texture or patterned fabric to create your embroidery hoop ornaments.
These embroidery hoop ornaments are so quick to make and super versatile too! You can use the hoops year after year and just change the fabric colors to suit your new decor!
To finish these off, I simply tied a piece of velvet ribbon to the top of the hoops to be able to hang them from my Christmas tree.
But your imagination is the only limit here! You can adorn, embellish and accessorize these embroidery hoop ornaments with bells, holly berries, ribbon, mini pine cones etc.
DIY Glitter Starburst Ornaments
Last but not least, I made some starburst glitter ornaments, which turned out SO pretty and that are a cinch to make!
I made these glam ornaments in gold and rose golds, but once again, you can use whatever paint and glitter colors you prefer to suit your own Christmas decor color palette and decor.
These glitter ornaments look a million bucks too, even though I used inexpensive materials to make them. All you need for this craft project are polystyrene balls, toothpicks, spray paint and glitter.
Once again, it's a super quick and easy ornament to make!

Three Easy DIY Christmas Tree Ornaments
Yield: several pieces
Estimated cost: $10
Three Easy DIY Christmas Tree Ornaments - gorgeous, glam DIY craft projects using embroidery hoops, baubles and fabric in pink and gold!
materials:
- polystyrene balls in 8 cm diameter
- fabric in your choice of colors
- ribbon
- string
- pompoms
- mini embroidery hoops
- felt
- acrylic paint in your choice of colors
- polystyrene balls in 4 cm diameter
- toothpicks
- spray paint in your choice of colors
- glitter in your choice of colors
- metal hooks for starburst ornaments
tools:
- craft knife
- pen
- scissors
- hot glue
- star cookie cutter
- thin paintbrush
steps:
DIY Plush Christmas Baubles
- Segment the 8 cm polystyrene balls with your craft knife to form 8 segments.
- Push small rectangles of fabric into the grooves or intersections of the segments with the back of the craft knife. Trim off excess fabric if needed.
- Hot glue ribbon piece at each intersection.
- Hot glue a piece of string to the top of the baubles.
- Hot glue pompoms to top and bottom of the bauble.
DIY Embroidery Hoop Ornaments
- Cut a piece of fabric a little larger than the diameter of the hoop.
- Place the fabric inside the hoop and tighten the screw to secure it in place.
- Paint the edges of the hoop and add glitter.
- Trace a star shape onto the felt using the cookie cutter as a template.
- Hot glue the felt star to the front of the embroidery hoop.
- Add a piece of ribbon to the top of the hoops.
DIY Starburst Glitter Ornaments
- Add toothpicks to one side of the 5 cm diameter polystyrene balls. Tip: add a dab of hot glue or super glue to end of sticks to stop them falling out.
- Add a metal hook to the back of the balls to be able to hang them.
- Spray paint the balls from about 10 cm distance.
- Immediately add glitter while the paint is still wet. Let it dry overnight.
Check out the DIY video tutorial below to see how I made all my three, gorgeous but easy DIY Christmas tree ornaments!
Hope you like the ideas and feel inspired to have a go! If you do, tag us on social media #BirdsParty so we can see and share your creativity! 😍
This post Three Easy DIY Christmas Tree Ornaments appeared first on Bird's Party Blog


Such lovely ornaments, and i love the tutorial at the end. I like that you can change these up for any color scheme, too! We would love to have you link-up at Tuesday Turn About, via myweeabode.com! Hope to see you there! Pinned!
ReplyDeleteYour DIY ornaments are so pretty and the color is very striking. I had to pin them! I'm visiting from Wow Me Wednesday / Ginger Snap Crafts.
ReplyDelete